Showing posts with label arduino. Show all posts

Sunday, April 10, 2022

Arduino Based Smart Distance Meter


 Arduino Based Smart Distance Meter


COMPONENT'S FOR THIS PROJECT'S

· ARDUINO NANO

· ARDUINO NANO SERIAL USB CABEL

· ULTRASONIC SENSOR (HC-SR04) 

· OLED DISPLAY

· BREAD-BOARD

· JUMPER WIRES

· BATTERY (optional) you can also use by usb cabel power supply

SOFTWARE & APPLICATION

· ARDUINO IDE

https://www.arduino.cc/en/software


CIRCUIT DIAGRAM


ARDUINO CODE'S


#include <SPI.h>

#include <Wire.h>

#include <Adafruit_GFX.h>

#include <Adafruit_SSD1306.h>


#define trigPin 9

#define echoPin 8


#define OLED_RESET 4

Adafruit_SSD1306 display(OLED_RESET);


void setup() {

Serial.begin (9600);

pinMode(trigPin, OUTPUT);

pinMode(echoPin, INPUT);

display.begin(SSD1306_SWITCHCAPVCC, 0x3C); //initialize with the I2C addr 0x3C (128x64)

display.clearDisplay();


}


void loop() {

float duration;

float distance_cm;

float distance_in;


digitalWrite(trigPin, LOW); //PULSE ___|---|___

delayMicroseconds(2);

digitalWrite(trigPin, HIGH);

delayMicroseconds(10);

digitalWrite(trigPin, LOW);


duration = pulseIn(echoPin, HIGH);


distance_cm = (duration/2) / 29.1;

distance_in = (duration/2) / 73.914;


display.setCursor(30,0); //oled display

display.setTextSize(1);

display.setTextColor(WHITE);

display.println("Distance Meter");


display.setCursor(10,18); //oled display

display.setTextSize(2);

display.setTextColor(WHITE);

display.println(distance_cm);

display.setCursor(90,18);

display.setTextSize(2);

display.println("cm");


display.setCursor(10,45); //oled display

display.setTextSize(2);

display.setTextColor(WHITE);

display.println(distance_in);

display.setCursor(90,45);

display.setTextSize(2);

display.println("in");

display.display();


delay(1000);

display.clearDisplay();


Serial.println(distance_cm);

Serial.println(distance_in);

}


YOUTUBE VIDEO LINK


https://youtube.com/shorts/bYwQIT8mi_Q?feature=share


Monday, April 4, 2022

Arduino Based Smart Bluetooth Control RC Car BY L298N MOTOR SHIELD

 Arduino Based Smart Bluetooth Control RC Car


COMPONENT'S for this project's

· ARDUINO UNO

· ARDUINO UNO SERIAL USB CABEL

· L298N MOTOR SHIELD

· HC-05 BLUETOOTH MODULE

· FRONT LED (WHITE) //OPTIONAL

· BACK LED (RED) //OPTIONAL

· HORN OR BUZZER //OPTIONAL

· CAR CHESSIS //OR YOU CAN MAKE IT BY YOURSELF

· 2 MOTOR FOR LEFT AND RIGHT // YOU CAN ALSO USE 4 MOTOR

· MOTOR WHEEL'S

· 6 TO 12 VOLTS BATTERY

· FIEW JUMMPER WIRE'S

· SMART PHONE // FOR CONTROLLING THE ROBOT CAR

Software & Application

· ARDUINO IDE

https://www.arduino.cc/en/software

· BLUETOOTH APPLICATION 

https://play.google.com/store/apps/details?id=braulio.calle.bluetoothRCcontroller


Circuit diagram


ARDUINO CODE'S


char t;

 long g=1000;

void setup() {

pinMode(13,OUTPUT);   //left motors forward

pinMode(12,OUTPUT);   //left motors reverse

pinMode(11,OUTPUT);   //right motors forward

pinMode(10,OUTPUT);   //right motors reverse

pinMode(9,OUTPUT);//Led

pinMode(8,OUTPUT);//BACK LIGHT

pinMode(6,OUTPUT);//horn

Serial.begin(9600);

}

void loop() {

if(Serial.available()){

  t = Serial.read();

  Serial.println(t);

}

if(t == 'F'){            //move forward(all motors rotate in forward direction)

  digitalWrite(13,HIGH);

  digitalWrite(11,HIGH);

}

else if(t == 'B'){      //move reverse (all motors rotate in reverse direction)

  digitalWrite(12,HIGH);

  digitalWrite(10,HIGH);

}

else if(t == 'L'){      //turn right (left side motors rotate in forward direction,)

  digitalWrite(11,HIGH);

  digitalWrite(12,HIGH);

  digitalWrite(9,HIGH); 

}

else if(t == 'R'){      //turn left (right side motors rotate in forward direction, )

  digitalWrite(13,HIGH);

  digitalWrite(10,HIGH);

  digitalWrite(9,HIGH);

}

else if(t == 'W'){      //turn front led on

  digitalWrite(9,HIGH);

}

else if(t == 'w'){      //turn front led off

  digitalWrite(9,LOW);

}

else if(t=='U'){        //turn back led on

  digitalWrite(8,HIGH);

}

else if(t=='u'){       //turn front led off

  digitalWrite(8,LOW);

}

else if(t=='V'){       //turn horn on

  digitalWrite(6,HIGH);

}

else if(t=='v'){       //turn horn off

  digitalWrite(6,LOW);  

}

else if(t == 'S'){      //STOP (all motors stop)

  digitalWrite(13,LOW);

  digitalWrite(12,LOW);

  digitalWrite(11,LOW);

  digitalWrite(10,LOW);

  digitalWrite(9,LOW);

  digitalWrite(8,LOW);

}

delay(100);

}

YOUTUBE VIDEO LINK


https://youtu.be/1h0rn_iHsZc

https://youtu.be/ChmNrEESvEw

https://youtu.be/sAWmG0a5eoY


Thursday, March 24, 2022

Arduino Based Smart Dustbin Box Sketch & Code's


Arduino Based Smart Dustbin Box Sketch & Code's


#include <Servo.h>

Servo myservo;  

int pos = 20;  

const int trigPin = 5;

const int echoPin = 6;

const int led = 13;


long duration;

float distance;


void setup() 

{

  myservo.attach(11);

  pinMode(trigPin, OUTPUT);

  pinMode(echoPin, INPUT); 

  pinMode(led, OUTPUT);

  myservo.write(pos);

}


void loop() 

{

  //Serial.begin(9600);

  digitalWrite(trigPin, LOW);

  delayMicroseconds(2);

  digitalWrite(trigPin, HIGH);

  delayMicroseconds(10);

  digitalWrite(trigPin, LOW);


  duration = pulseIn(echoPin, HIGH);

  distance = 0.034*(duration/2);

  //Serial.println(distance);

  if (distance < 27)

  {

    digitalWrite(led,HIGH);

    myservo.write(pos+160);

    delay(1000);

  }

  else 

  {

    digitalWrite(led,LOW);

      myservo.write(pos);

  }

  delay(300);

}

Saturday, May 22, 2021

Arduino

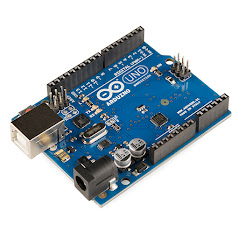
What is a Arduino ?


An Arduino is a single board micro-controller computer. That can be program by computer by the software called Arduino IDE.

The microcontrollers can be programmed using the C and C++ programming languages, using a standard API which is also known as the "Arduino language". 


Its basically used for creating projects. By simply writing program and code in an Arduino IDE software after writing code we have to firstly connect Arduino to our computer and check the port and also check the proper board name in board manager section. And last verify the code then after upload the program. Then it will take few seconds to upload the program successfully.

 And then program will run in the board.

Smart Snapchat Card

  Smart Snapchat Social Media Card Seamless Connections: Adding the Smart Snapchat Card with a Scan or a Simple Hold. Introduction: In the r...